Getting Started with Quick License Manager Enterprise
QLM Enterprise offers all the features of QLM Professional. Additionally, QLM Enterprise supports floating licenses on Windows as well as Analytics to track installs, uninstalls and usage of your application.
QLM Enterprise provides manages floating via a database stored on the end user network. The database can be a simple XML file, a MS-Access DB or a SQL Server DB.
Check out the Step by Step guide to support floating licenses.
Adding licensing support to your application is a 3 step process.
Read about the differences between QLM Professional and QLM Enterprise.
Define products
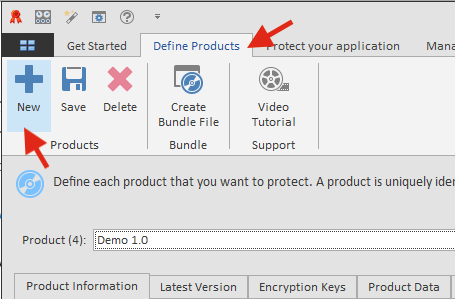
The first step in creating license keys for your products is to define each product. Click on the Define Products tab and then click on New.

Enter the Product Name, the Major and Minor version of the product. The Product ID and the GUID fields are automatically generated. You will need these values when you use the API to validate license keys. You may also associate up to 32 features with each of your products.
If you are evaluating QLM, we recommend that you use the Demo 1.0 product during the trial period.

Modify your application to validate a license key
The simplest way to integrate QLM to your application, is to use the QLM License Wizard standalone application.
The QLM .NET Control provides a ready-to-go license activation form. If your application is developed in .NET, check out this tutorial for a step by step instruction on how to integrate using the QLM .NET Control.
If your application is not a .NET application, you can use the QLM License Wizard standalone appication to manage the license activation process. For a tutorial on how to use the QLM License Wizard, click here .
Of course, you can always create your own license registration form and use our extensive API to manage license validation and activation.
For details about modifying your application to implement floating licenses, refer to the Step by Step guide.
Below are step by step instructions to integrate QLM in your application:
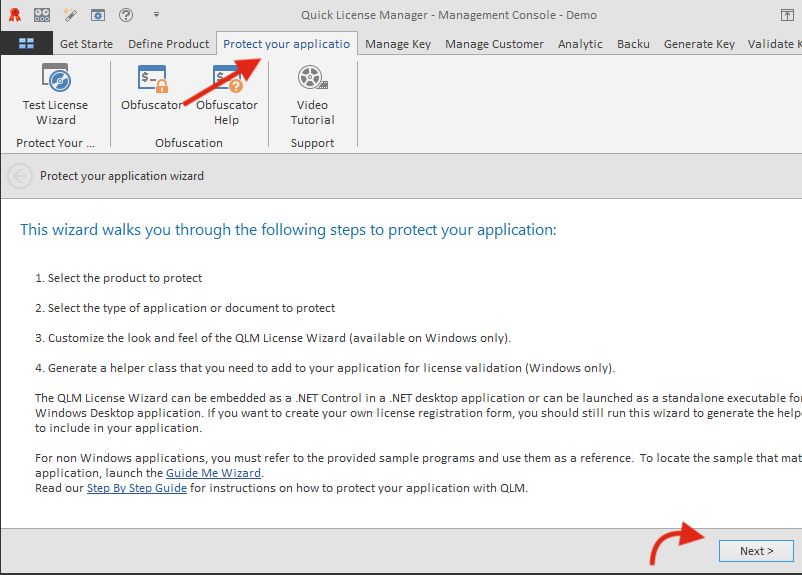
1. From the Protect your application tab, follow the instructions in the wizard. QLM will generate the code that you need to add to your application.
2. For .NET applications:
a) add to your application a reference to: QlmLicenseLib.dll
a) add to your application a reference to: QlmControls.dll

3. In your application, as soon as your application is started, call the ValidateLicenseAtStartup function (found in the generated code above).
4. If the ValidateLicenseAtStartup function returns false, it means there is no valid license and you must prompt the user for a license.
5. If you are using the QLM .NET Control, display a form containing the QLM .NET Control to allow the user to register his license.
6. If you are not using the QLM .NET Control, launch the QLM License Wizard application (with the proper command line arguments).
7. Upon successful activation of the license, close the license form and display your application.
For more details about specific APIs, refer to the API reference found in the online help.
Several sample applications are included in the Samples folder developed in VB6, VC6, VB.NET, C#, VC7, and Excel.
Generate license keys
Once you have defined your products, you can generate license keys for each product. There are 2 types of license keys: permanent, and evaluation/subscription keys. Evaluation/Subscription keys can specify the duration of the license, an expiry date or both.
Prior to creating license keys with QLM Enterprise, you need to setup the QLM License Server and a database that will host the license keys. For instructions on installing the QLM License Server and the database, refer to the help.
For evaluation purposes, Soraco provides a demo License Server and a database. The only restriction of our demo web service is that you cannot publish your products to the License Server; you can only work with the default product Demo. Additionally, note that the database content on the demo License Server is regularly reset.
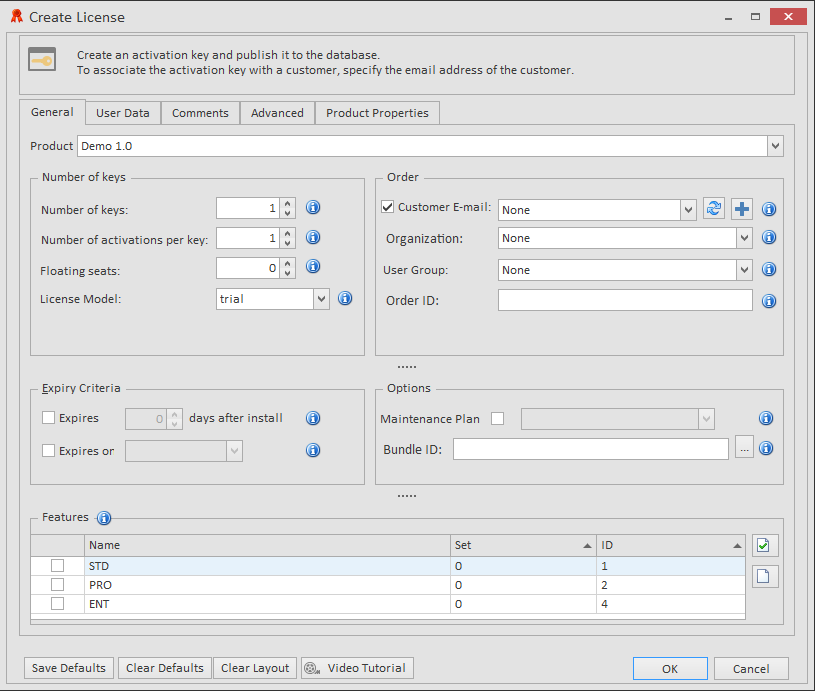
To generate license keys with QLM Enterprise, click on the Manage Keys tab, then click on the Create button. Select a Product, the number of floating seats, the type of keys to generate and then click on the OK button. QLM stores the generated keys in a database.


Samples
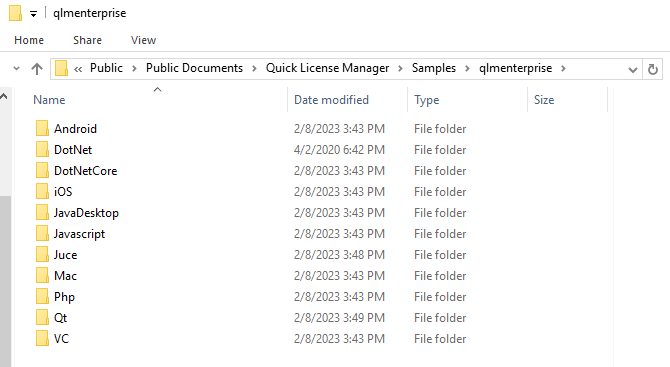
All QLM Enterprise samples are located in the folder:
C:\Users\Public\Documents\Quick License Manager\Samples\qlmenterprise
Samples are grouped by programming language.

.NET Samples:
-
DotNet\C#\QlmFloatingLicenseSample – This sample shows how to implement floating licenses in C#.
Android:
-
Android\Java: Android sample in Java shows how to add online activation to your Android application.
-
Android\DotNet: Android sample in C# using Xamarin shows how to add online activation to your Android application.
Qt:
-
QlmQtSampleApp: Sample shows how to add online activation to a Qt cross platform C++ app.
iOS:
-
iOS\QLMiOSSample: iOS sample shows how to add online activation to your iOS application.
Java Desktop:
-
JavaDesktop\QlmJavaDesktopSample: Java Desktop sample shows how to add online activation to your Java Desktop application.
Java Script:
-
JavaScript\electron-sample: Electron sample shows how to add online activation to a Javascript app.
PHP:
-
QlmPhpSample: Sample shows how to add online activation to a PHP app.
Mac:
-
Mac\QlmMacSample: Mac sample shows how to add online activation to your Mac application.
JUCE:
-
JUCE\jucesample
VC:
-
VC\QlmFloatingAndNodeLockedSample
-
VC\QlmFloatingLicenseSampleCpp
.NetCore:
-
DotNetCore\QlmAspNetRazor
-
DotNetCore\QlmNetCoreConsoleApp
